Scrapbooking is more than just arranging photos on a page. This beginners guide is designed to walk you through the fundamental aspects of scrapbooking, ensuring that you start off on the right foot.
Welcome to the wonderful world of scrapbooking, where creativity knows no bounds, and memories are transformed into beautiful, tangible works of art. Whether you’re looking to commemorate special occasions, capture everyday moments, or simply express your creativity, scrapbooking offers a unique and rewarding outlet. But before you embark on your scrapbooking journey, it’s essential to familiarize yourself with the basic tools, materials, and techniques that will set you up for success.
Scrapbooking is more than just arranging photos on a page. It’s a form of storytelling that allows you to combine photographs, keepsakes, and your own artistic touch to create meaningful and personalized layouts. These layouts can capture everything from the milestones of life to the simple joys of each day. As a beginner, you might be feeling a mixture of excitement and uncertainty – and that’s perfectly normal! This guide is designed to walk you through the fundamental aspects of scrapbooking, ensuring that you start off on the right foot.
Section 1: Basic Tools for Scrapbooking
- Paper Trimmer or Scissors: A reliable paper trimmer or a pair of sharp scissors is your best friend in scrapbooking. Precise cutting is key to creating clean and professional-looking layouts.
- Cutting Mat: Protect your work surface and ensure accurate cuts with a cutting mat. Look for one with measurements and gridlines for added convenience.
- Adhesive Options: Adhesives are the glue that holds your masterpiece together. Choose from glue, double-sided tape, and adhesive dots based on your preferences and the elements you’re attaching.
- Ruler and Pencil: These basic tools are handy for measuring, aligning, and planning your layout before committing to adhesive.
- Bone Folder or Scoring Tool: If you’re interested in adding folds or creases to your designs, a bone folder or scoring tool is indispensable.
- Craft Knife: A craft knife is excellent for intricate cutting and creating special effects, like windows or pop-ups.
- Hole Punch or Crop-A-Dile: These tools are essential for adding holes to your pages for binding or attaching elements like tags and ribbons.
- Stamps and Ink Pads: Stamps allow you to add decorative patterns, images, and sentiments to your layouts. Ink pads come in various colors to suit your design.
Remember, these tools are the building blocks of your scrapbooking toolkit. As you gain experience, you might explore more specialized tools, but these essentials are a great starting point for beginners.
Section 2: Essential Materials
Creating a captivating scrapbook layout goes beyond just having the right tools. The materials you select play a crucial role in bringing your vision to life and ensuring that your memories are preserved for years to come. When choosing materials, it’s important to opt for acid-free and archival-quality options to prevent deterioration over time. Let’s explore the essential materials that form the foundation of any successful scrapbook project:
Cardstock and Patterned Paper
Cardstock is a heavy and sturdy paper that provides stability and structure and is used as a base for your layouts. It comes in a variety of colors and textures, allowing you to match the theme and mood of your layout. Cardstock serves as a reliable canvas for mounting your photos and embellishments.
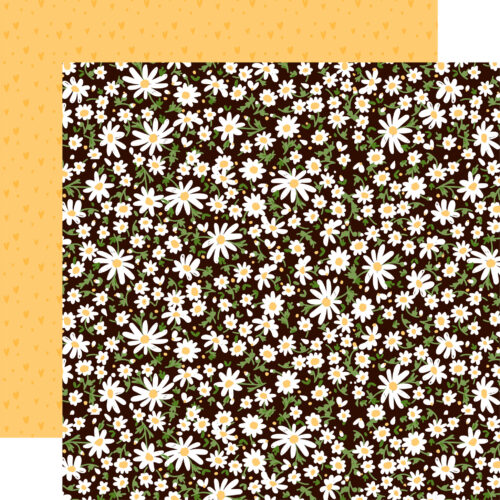
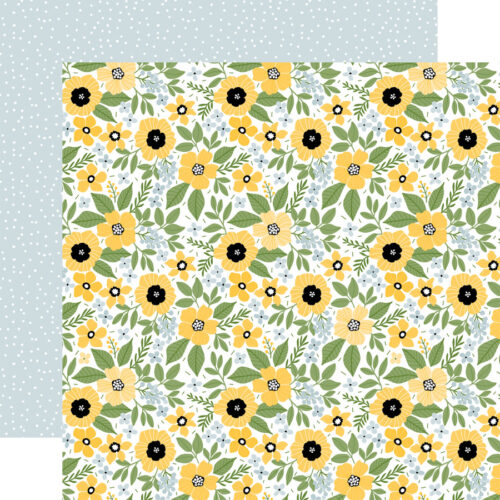
Patterned paper adds personality and flair to your scrapbook pages. It comes in a wide array of designs, from florals and geometrics to stripes and polka dots. Mixing and matching patterns can add visual interest to your layouts. Just remember, patterned paper should complement your photos and not overwhelm them.
Photographs and Memorabilia
At the heart of scrapbooking are the cherished photographs that tell your stories. Choose high-quality prints and ensure they are well-cared for during the scrapbooking process. Crop, mat, or layer your photos to draw attention to the focal point of each layout.
Whether it’s ticket stubs, postcards, or handwritten notes, incorporating memorabilia adds an authentic touch to your scrapbook. Make sure to treat delicate items with care, and consider using adhesive pockets or small envelopes to keep them secure.
Embellishments (Stickers, Die-Cuts, Chipboard)
Stickers come in an array of themes and styles, making them versatile embellishments for any scrapbook layout. From letters and words to icons and designs, stickers can add pops of color and enhance your storytelling.
Die-cuts are pre-cut shapes and designs that can be easily added to your layouts. They come in various materials, such as paper, cardstock, and even fabric. Die-cuts can be floral, geometric, seasonal, or thematic, providing endless creative possibilities.
Chipboard elements are thicker and sturdier than regular paper, adding dimension and texture to your pages. They can be left as-is or further embellished with paint, ink, or other decorative techniques.
Journaling Cards and Tags
Journaling cards provide space for you to add written narratives, thoughts, and memories to your layouts. They come in different sizes and styles, allowing you to choose the best fit for your design.
Tags are small, decorative elements that can be used for journaling, labeling, or as visual accents. They can be attached to layouts using strings, ribbons, or adhesive.
Page Protectors and Albums
Page protectors safeguard your layouts from dust, moisture, and physical handling. They come in various sizes and configurations, such as pockets for holding memorabilia. Choosing acid-free, archival-quality page protectors is essential for preserving your creations.
Albums provide a home for your completed layouts. Opt for albums that match the size of your page protectors and suit your style preferences. Albums are a wonderful way to showcase your creativity while keeping your memories safe.
As you gather these materials, keep in mind the theme and tone of your scrapbook project. Cohesiveness in color schemes, patterns, and materials will help create a visually pleasing and harmonious final product. With the right materials in hand, you’re well on your way to crafting beautiful and meaningful scrapbook layouts.
Continue to the next section, where we’ll delve into the basic scrapbooking techniques that will bring your pages to life.
Section 3: Basic Scrapbooking Techniques
Now that you’re equipped with the essential tools and materials, let’s explore some basic scrapbooking techniques that will elevate your layouts and add that special touch of creativity. These techniques are the building blocks of scrapbooking, allowing you to infuse depth, texture, and personality into your pages. Let’s dive in:
Layering and Dimension
Layering involves arranging different elements on your layout to create depth and visual interest. By layering photos, patterned paper, embellishments, and journaling cards, you can achieve a dynamic and multidimensional effect.
Example: Start by adhering a piece of patterned paper as your background. Then, layer smaller pieces of paper at different angles, creating a foundation for your photos. Add dimension by attaching stickers or die-cuts with foam adhesive to lift them off the page. This creates a sense of depth that draws the viewer’s eye.
Matting Photos
Matting photos involves framing your pictures with colored or patterned paper, enhancing their visibility and providing a polished look.
Example: Select a slightly larger piece of cardstock or patterned paper than your photo’s dimensions. Adhere your photo to the center of this mat, leaving a border of the matting paper visible around the edges. This technique not only makes your photo stand out but also adds an elegant touch.
Adding Borders and Frames
Borders and frames act as decorative edges that encase your layouts or individual elements. They help define the boundaries of your design and can tie together different elements.
Example: Use a strip of coordinating patterned paper to create a border along the edges of your layout. Alternatively, frame a specific photo or section of your layout with a decorative frame or border sticker.
Incorporating Journaling
Journaling is the written narrative that accompanies your photos and embellishments. It provides context, personal insights, and stories that bring your memories to life.
Example: Create a designated space for journaling on your layout. This could be a journaling card, a tag, or even directly on the background paper. Write down your thoughts, emotions, and anecdotes related to the photos, adding a layer of storytelling to your design.
Embellishing with Stickers and Die-Cuts
Stickers and die-cuts are versatile embellishments that add character to your layouts. They can be used to emphasize themes, sentiments, and motifs.
Example: Choose stickers or die-cuts that match the theme of your layout. Place them strategically around your photos and journaling elements. For instance, if you’re creating a travel-themed layout, embellish with stickers of landmarks, modes of transportation, or travel-related phrases.
Remember, these techniques are just the beginning. As you become more comfortable with these foundational techniques, you’ll discover your own unique style and preferences. Experiment with different combinations, and don’t be afraid to let your creativity flow. Each layout you create becomes a canvas for your stories and memories to shine.
In the next section, we’ll discuss how to set up a comfortable and organized scrapbooking workspace, ensuring that you have an environment conducive to your creative process.
Section 4: Setting Up Your Workspace
Creating a dedicated and organized workspace is essential for a smooth and enjoyable scrapbooking experience. Having a designated area not only streamlines your creative process but also allows you to immerse yourself fully in your projects. Let’s explore how to set up an efficient and comfortable scrapbooking workspace.
- Choose the Right Location: Select a spot with good lighting to prevent eye strain and ensure accurate color perception. Natural light is ideal, but if that’s not possible, invest in bright, adjustable lighting.
- Gather Essential Supplies: Keep your basic tools, adhesives, and frequently used materials within arm’s reach. This prevents constant interruptions to fetch supplies, keeping your flow steady.
- Invest in Storage Solutions: Use shelves, drawers, and storage containers to keep your tools and materials organized. Clear bins are particularly helpful, allowing you to see what’s inside without rummaging.
- Create a Work Surface: Whether it’s a spacious table, desk, or dedicated scrapbooking station, having enough room to spread out your materials is key. Make sure the surface is easy to clean, as crafting can get messy.
- Personalize Your Space: Add touches that inspire you, such as artwork, motivational quotes, or a vision board. A comfortable chair and some background music can also enhance your creative environment.
- Maintain Order: Regularly declutter and organize your space. Return tools to their designated spots after each session to avoid unnecessary confusion.
- Consider Ergonomics: Ensure your workspace is ergonomically designed to prevent strain on your body. Your chair, desk height, and posture should promote comfort during long crafting sessions.
Having a dedicated scrapbooking workspace provides a haven for your creativity to flourish. Now, let’s explore where you can find inspiration to fuel your scrapbooking projects.
Section 5: Where to Find Inspiration
As a beginner scrapbooker, finding inspiration is an exciting journey that enhances your creativity and pushes the boundaries of your designs. Here are various sources where you can discover fresh ideas and ignite your artistic imagination:
Online Scrapbooking Communities and Social Media Platforms
Connect with fellow scrapbook enthusiasts on platforms like Instagram, Pinterest, and Facebook. Explore hashtags and groups dedicated to scrapbooking to discover a wealth of layouts, techniques, and ideas.
Join our Scrappin’ N Chattin’ Facebook group!
Magazines and Books
Scrapbooking magazines and how-to books are treasure troves of inspiration. They feature layouts, tutorials, and tips from experienced scrapbookers that can spark your own innovative ideas.
Classes and Workshops
Online and local classes offer the opportunity to learn new techniques and interact with seasoned instructors. You’ll not only gain valuable skills but also be inspired by the projects and creativity of others.
Nature, Travel, and Everyday Life
The world around you is a rich source of inspiration. Capture moments from your travels, draw from the beauty of nature, and find creativity in your daily experiences.
Remember, inspiration can be found everywhere. Keep an open mind and explore a variety of sources to uncover ideas that resonate with you. As you experiment and learn, you’ll develop your unique style and approach to scrapbooking that reflects your personality and stories.
With a well-organized workspace and a plethora of inspiration, you’re ready to embark on your scrapbooking journey.
Section 6: Start Scrapping!
Congratulations, aspiring scrapbooker, on completing your journey through this beginner’s guide to scrapbooking essentials! We’ve covered the crucial aspects of starting your creative adventure, from understanding the importance of the right tools and materials to exploring techniques that breathe life into your layouts. As you step into this world of artistic expression, keep these key takeaways in mind:
- Starting with the Right Tools and Materials – Remember that your tools and materials are the foundation of your creative endeavors. Choosing acid-free and archival-quality supplies ensures that your memories are preserved for generations to come. The combination of quality tools and materials empowers you to craft stunning layouts that encapsulate your stories.
- Embrace the Creative Process – Scrapbooking is not just about the end result; it’s about the journey of creation. Don’t rush – take your time, experiment fearlessly, and enjoy every step of the process. Each layout is an opportunity to infuse your personal touch, share your stories, and celebrate the moments that matter most to you.
Explore Our Beginner-Friendly Supplies
Ready to embark on your scrapbooking journey? We invite you to explore our store’s selection of beginner-friendly supplies that cater to your needs. From cardstock and patterned paper to adhesives, stickers, and tools, we’ve got everything you need to kick-start your creative projects.
Share Your Creations with Us!
We’re thrilled to see your creativity in action. Share your beginner scrapbooking projects on social media using the hashtag #ScrappingWithHoney. Your creations might just inspire others to take their first steps into the world of scrapbooking!
Join Our Workshops and Events
Stay tuned for our upcoming workshops and events tailored for beginners. Whether you’re looking to learn new techniques, connect with fellow crafters, or simply soak in the inspiration, these opportunities are designed to further enhance your scrapbooking journey.
Thank you for joining us on this exciting introduction to the art of scrapbooking. Your memories are precious, and we’re here to help you transform them into tangible treasures that will be cherished for years to come. Happy scrapbooking!


